
Create multi-step forms that induce a positive user experience and increase conversions with Forminator.
Multi-step forms are one of the best-recommended form strategies by top marketers to increase the conversion rate. Since the multi-step form (also known as multi-page and multi-part forms) asks for user information in a smaller chunk, users won’t feel the burden or psychological friction they will experience in a long single form format. Eventually, the conversion rate will increase.
For instance, BrokersNotes, a financial B2C website, used multi-step forms, and their conversion rate increased from 11% to 46% overnight. You can read Venture Harbour’s lead generation form examples collection to get a clear idea before you strategize your plan.
Forminator’s powerful drag and drop builder allows you to create stunning forms within minutes. In this post, we are going to see how to add multi-step forms to WordPress using Forminator.
Table of Content:
Creating Multi-step Form
Customize the Progress Bar and Button
Adding Multi-step Forms to WordPress
Start Increasing Conversion
Creating Multi-step Form
If you are new to Forminator, read this article to know how to create a form using the Forminator – (https://wpmudev.com/blog/creating-the-perfect-contact-form-with-forminator/).
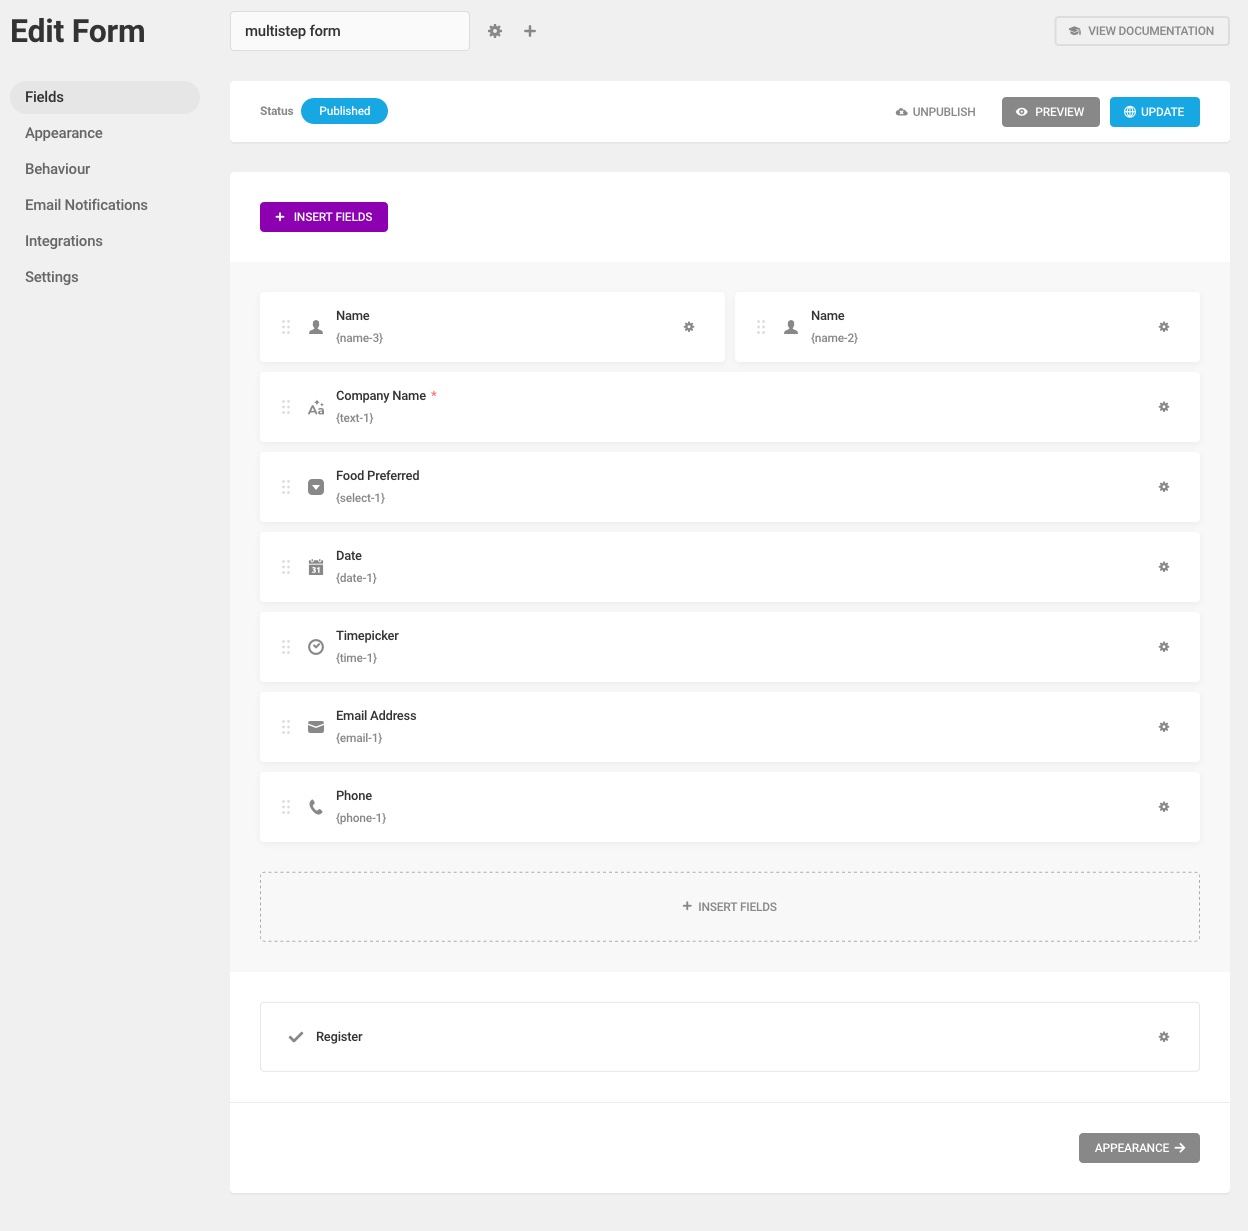
For this article’s purpose, I have already created a single-page event registration form using the Forminator.

As you can see in the image above, the form is a bit too long. I’ve asked for the user’s name, email address, phone, company name, and four other pieces of information. Showing all form fields in one place won’t encourage most users to complete the form. That’s why we are going to break the form into small pieces; for that, we’ve to head on the Forminator dashboard in the admin panel.
The form will be looking similar to the image below in your admin panel.
I am going to split this form into three steps. At first, I will get the user’s name; after that, I will let the user select their preferred food type and desired time, and at last, I will get their email address and contact information. To break this form into a multi-step form, all you have to do is drag and drop the page break module from the insert field option.

Now that I’ve added the page break, the form fields will be separated accordingly. You can preview the form to get a clear idea and can change the page breaking order as per your requirement. The form will be looking like the image below after adding the page breaker.

Customize the Progress Bar and Button
We’ve created a multi-step form, but a good multi-step form doesn’t end there; we have to add/customize the progress bar.
Adding a progress bar lets the user quickly understand how much they have completed and helps them get a rough idea about how much time they may need to complete the form.
As progress bars are essential in multi-step form, Forminator gives you two types of progress indicators. You can either show the progress as STEPS or as a PROGRESS BAR.
“Steps” style is recommended when you have only two or three steps in your form because it will encourage the user to fill the form by informing that there are only three simple steps. Whereas the “progress bar” is a good fit for multi-step forms with more than five steps.
You can customize the progress bar by clicking the cogwheel icon in the pagination module shown at the top of your multi-step form. Under the settings option, you can choose the progress indicator you want in your form.

Customizing the buttons and buttons text on the multi-step form is also a crucial task. Some multi-step forms may allow the users to move to the previous step and change the entries. On the other hand, some multi-step forms don’t want the user to move to the previous step and alter the information.
In order to provide the previous and next buttons on your form, you have to click the cogwheel icon of the pagination module and go to the settings option. Under the Buttons text, select the custom type and add the button texts you want on each step of the form. For this example, I am going to set the custom texts to be Previous and Next.

Adding Multi-step Forms to WordPress
Preview the form after you completed editing the form to see whether the form has come out perfectly as you intended. Once you are satisfied with the result, you can publish the form. The Forminator will show you a shortcode at the end, copy and paste it on the page you want.
Don’t worry if you haven’t copied the shortcode during the time of publishing; you can always copy the code from the Forminator dashboard. Click the cogwheel icon on the form you need and select the “COPY SHORTCODE” option.

If you are using a Guttenberg editor, Forminator will make your job even simple. Just go to the page where you want to add the multi-step form. Select the “Forminator form” block from the Gutenberg editor, choose the multi-step form you want, and just like that, your multi-step form will be on the WordPress website page you want.

Start Increasing Conversions
After completing all my work, my multi-step registration form is going to look like this.

Experts always mention that shorter forms convert better; it is the Golden Rule of form designing. With the multi-step forms, you make the form shorter and also manage to get more relevant information that may help you grow your business.
